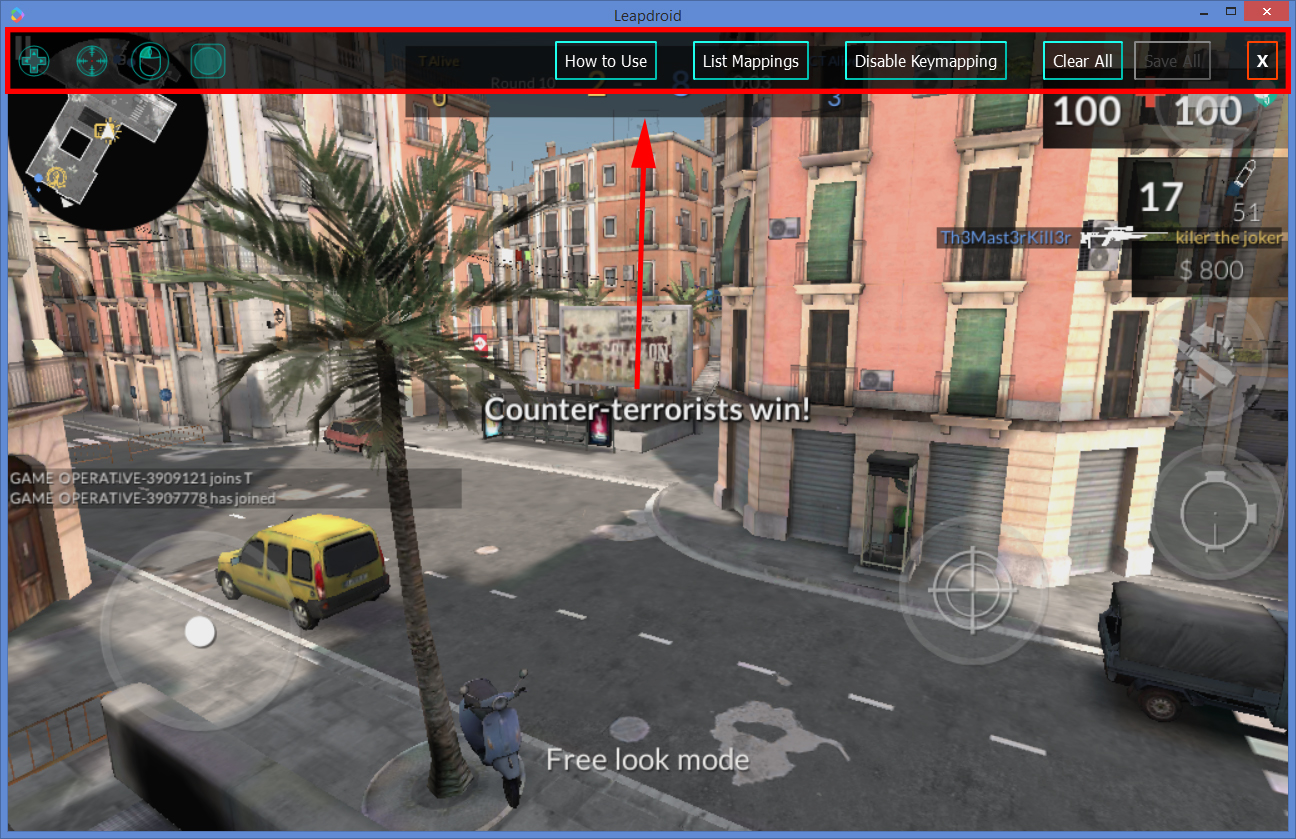
When you open the key mapping editor, you’ll notice the key mapping toolbar at the top.
Starting from the left of the toolbar, we have four buttons. Each button can map a specific
touch gesture to the keyboard and mouse. On the right, there are buttons you can use to save,
view details, and get help regarding the key mappings. We have details about each button below.
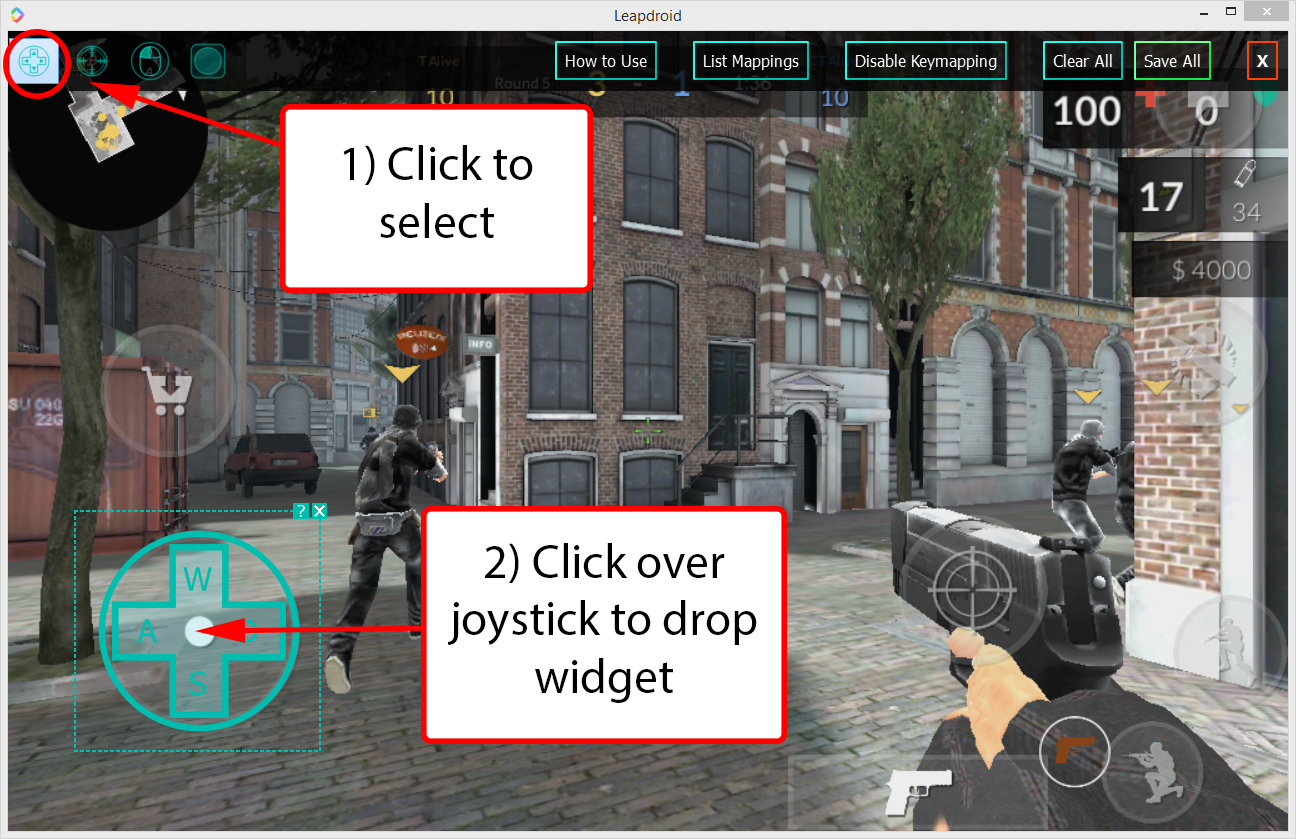
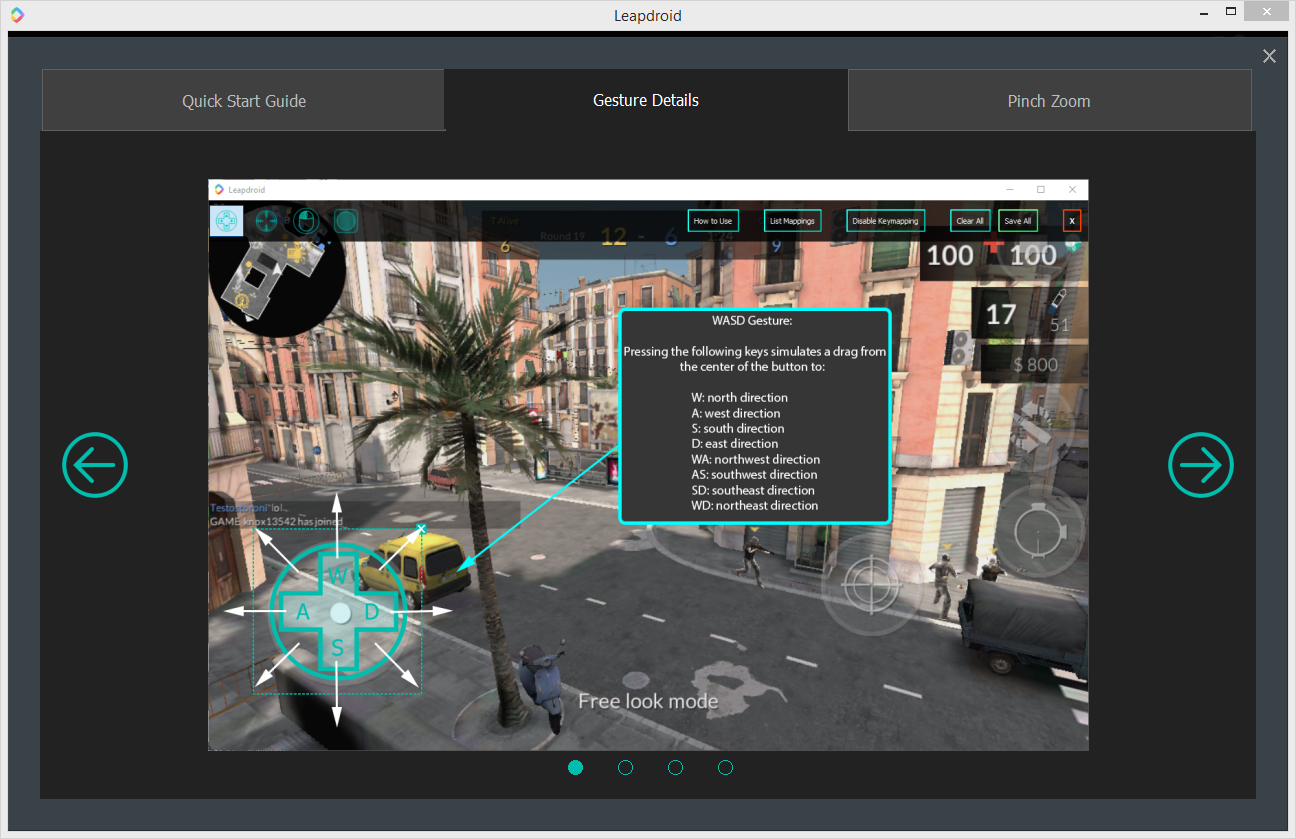
1) The D-Pad (WASD) Button:
For any games that have some type of joystick or D-Pad, you can place this button right on top of it,
so you can use the W, A, S and D keys to control it.
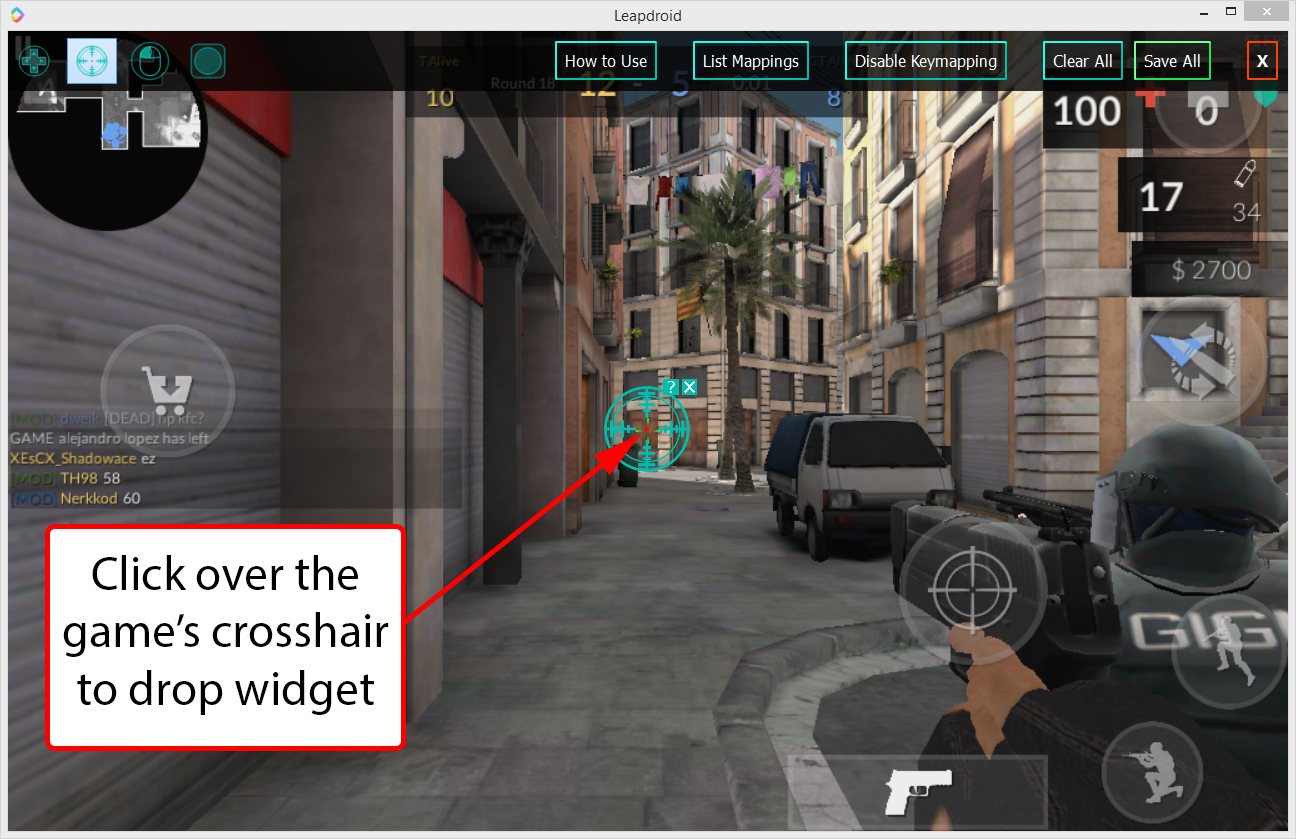
2) The Crosshair Button:
For most shooting games, you would usually drag your finger around the screen to aim. If you place this
button at the center of the game, or whereever the crosshair is for the game, you can simply move your
mouse to aim.
Note: If you have this enabled, you can only disable it by right-clicking.
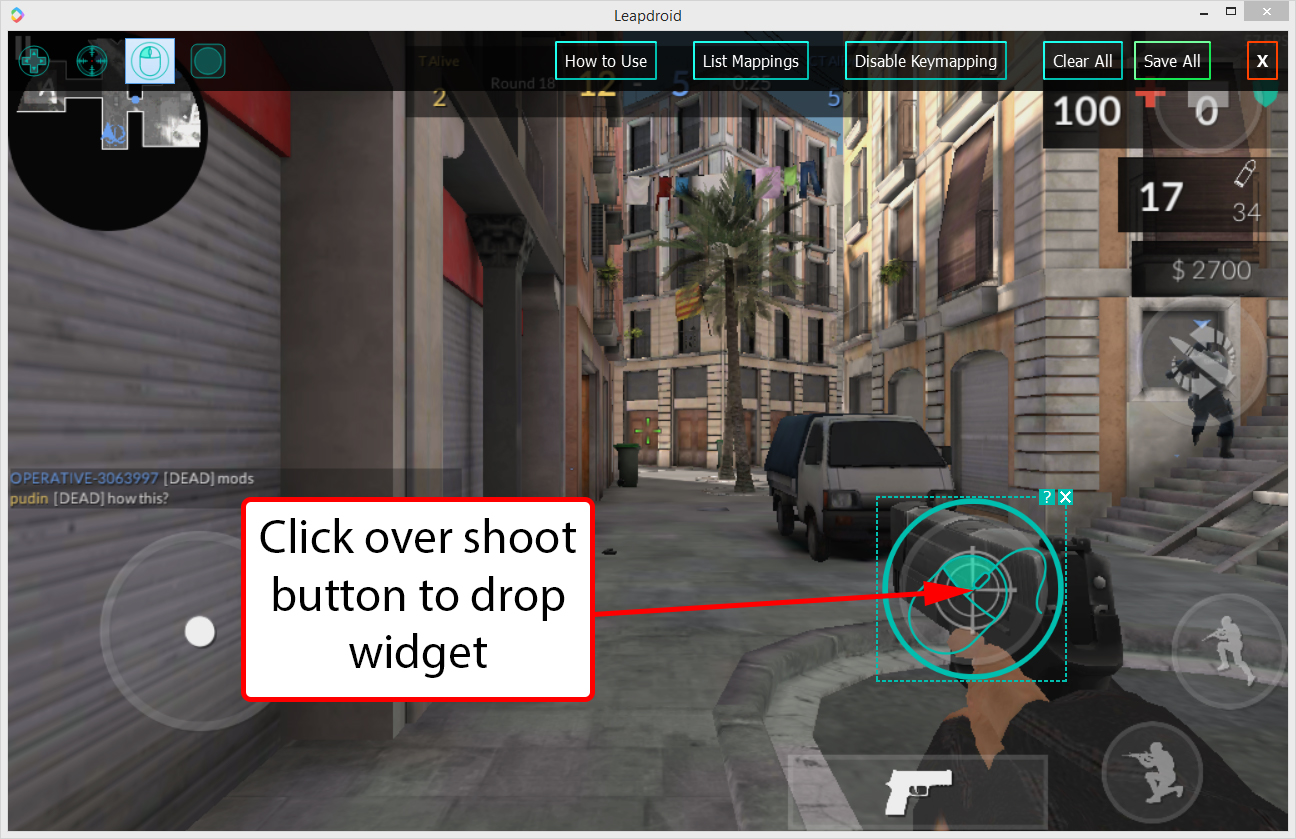
3) The Mouse Button:
This button is useful for shooting games, if you want to shoot with the left mouse button. Simply place this
button over where the “shoot” button is, and you’ll be able to shoot by clicking/holding down the left mouse
button.
Note: If you have this enabled, you can only disable it by right-clicking.
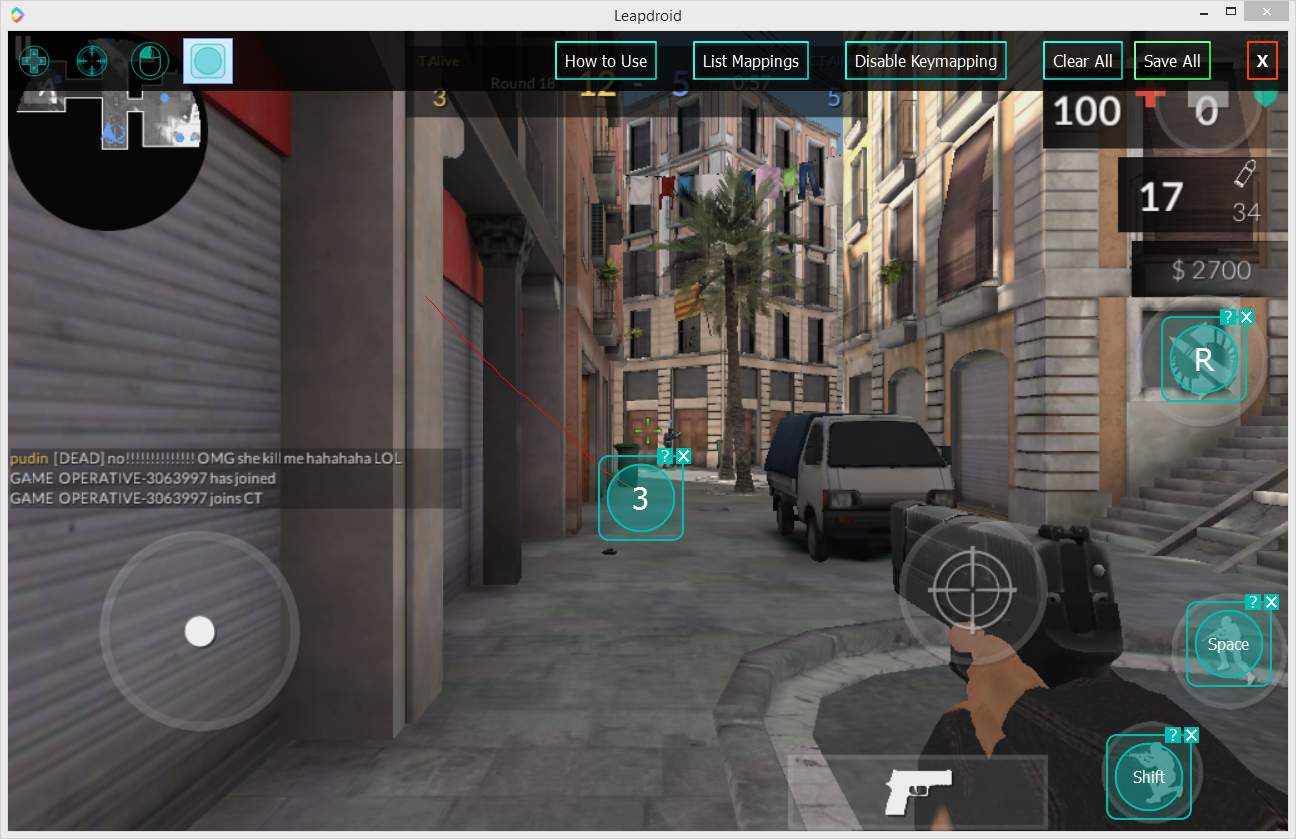
4) The Custom Button:
This button is for any other touch gesture you want to simulate, whether it be a tap or some complex movement.
To use, click any area for a tap, or press and drag for more complicated gestures. Once you’re done, press any
key on the keyboard, so when you press that key, it will simulate either the tap, or the gesture.
5) The How to Use Button:
Shows a window on how to use this tool, as well as the features we provide.
6) The List Mappings Button:
Shows a window on what keys and mouse buttons are being mapped.
7) The Enable/Disable Button:
Toggles the key mapping between an enabled and disabled state.
Note: you can also right-click to enable/disable when the key mapping editor is closed.
8) The Clear All Button:
Removes all of the key mapping buttons on the screen.
9) The Save All Button:
Saves the key mappings you’ve placed on the screen and closes the key mapping editor.
10) The Close Button:
Closes the editor without saving any changes.